Table of Contents
1. ACCESSING THE PLATFORM
2. VIEW CONTENT
3. CREATING A NEW RADAR
4. VIEW PHENOMENA ON THE RADAR
5. EDIT THE RADAR
6. ADD PHENOMENA TO THE RADAR
7. REMOVE PHENOMENA FROM THE RADAR
8. CREATE AND EDIT YOUR OWN CONTENT
9. COLLABORATION TOOLS
10. INVITE AND ACTIVATE USERS
11. EXPORT THE RADAR AND COLLABORATION RESULTS
12. FUTURES PLATFORM SUPPORT
1. ACCESSING THE PLATFORM
You will receive an email with your login details.
Please check the trash or spam folder if you don't see this email in your Inbox.
First, you will be asked to create a password.
Follow the link in the email to the platform login page, or: https://go2.futuresplatform.com.
If you lose your password, you can request a new one by clicking “Forgot your password?” under the login. We recommend you to use the Chrome browser for the best user experience.
2. VIEW CONTENT
The content on the platform (phenomena/trends) has been segmented under 30 main themes (read more about the content here).
Within those themes, Futures Platform has over 900 phenomena, and the number is growing continuously. You can view the list of our 30 themes and the list of phenomena within those themes here.
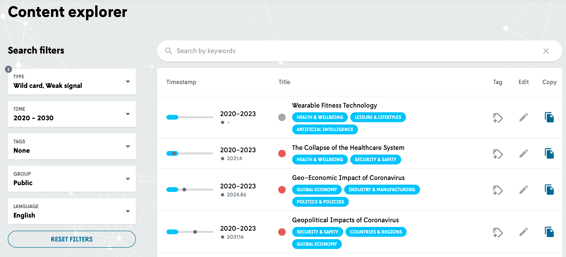
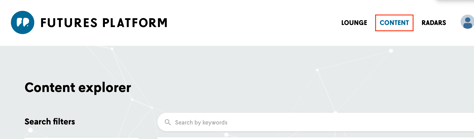
From your Dashboard, click "CONTENT" in the top menu to access the Content Explorer view.
You can make a keyword search to the search box, and the AI-powered search will suggest you relevant phenomena matching your search keywords.
To improve your search results, the system automatically uses other ontologically similar search terms in addition to the keywords you type.
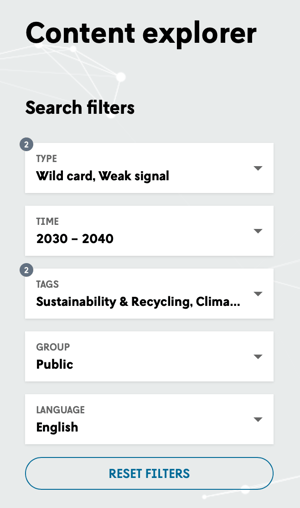
You can also filter your search further by e.g. Type, Time and Tags related to the content.
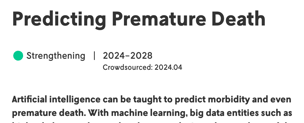
Click the title of any available item to open the ‘trend card’ in question.
On the trend card, you can view more information about the trend, such as a detailed description and a constantly-updated section of related news content.
The phenomena are categorised into five different types, read more about the types here (section 1.3).
The phenomena cards and content explorer list views include Time Stamps that are set by the author, complemented with the crowdsourced median (which is automatically calculated from all locations of phenomena on all radars using year format, excluding text format radars).
 |
All ”FP phenomena” will have FP author's estimation but other phenomena don't have it included automatically. Editors can add and edit timestamps to their phenomena later, if needed. All phenomena that are located on any radar, have the crowdsourced timestamps visible.

Provided you have sufficient user rights, you can duplicate the trend card by clicking the “Copy” button, or customize your phenomenon by clicking the “Edit” button (see more about adding and editing phenomena from section 8 of this guide).
3. CREATING A NEW RADAR
Radars are a great way to visualize the view of the future of different themes and contexts. Read more here what you can use the radars for. Radars are sectioned into sectors and time horizons, which can be modified. Futures Platform offers you empty radar templates to start with, as well as 40 radars that our team of futurists have created and update on a continuous basis.
The time horizons on 0ur ready-built radars have been organised to reflect different time periods. The first time horizon represents the time between today and 2023, next horizon on the radar reflects the time period between 2023 and 2028, and the outer horizon time period between 2028 and 2040. These sectors and time horizons are fully customizable (see instructions here).
You can find the radars from the Radars page or from the bottom of the Lounge page.
*Note:
Only the Owner/Coordinator of the group has the rights to see all radars that are available in the group. If you have user-level access, you will only be able to see the radars that the group Owner/Coordinator has given you access to.
Read more about user access levels here.
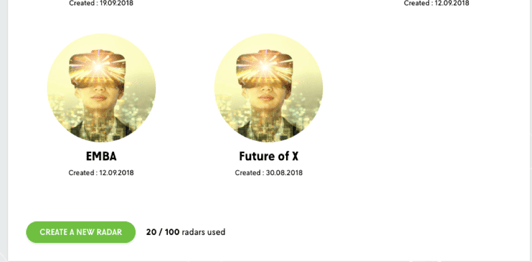
In case you already have radars created in your group you can see them there. Access a radar by clicking the picture of the radar.
See here a video of how to create a radar.
You can start creating your radar by clicking the green "Create a new radar" button in your Groups-section on the Lounge / the Radars page. If you can not access the button you might not have capacity in your licence (or you must purchase a license). In these cases contact us at support@futuresplatform.com.
First, you must select if you wish to start with an empty radar (Select "Empty" from the "Prefilled content" dropdown), or do you want to open one of the 40 radars that Futures Platform's team of foresight analysts have created and are updating (see the full list here). In this case select "Prefilled" from the "Prefilled content" dropdown menu.
You can only change the Group if you belong to multiple Groups. The Language selection has two options; Finnish and English. Click Continue.
3.1. If you select "Prefilled" from the "Prefilled content" dropdown menu, next you can search from the selection of our ready-built radars the one that fits your scope the best (see the full list of radars below). You can search with keywords. We recommend to use one keyword at a time, and to try different spellings and keywords.
The intelligent search suggests you three most suitable options which you can preview before selecting the best one.
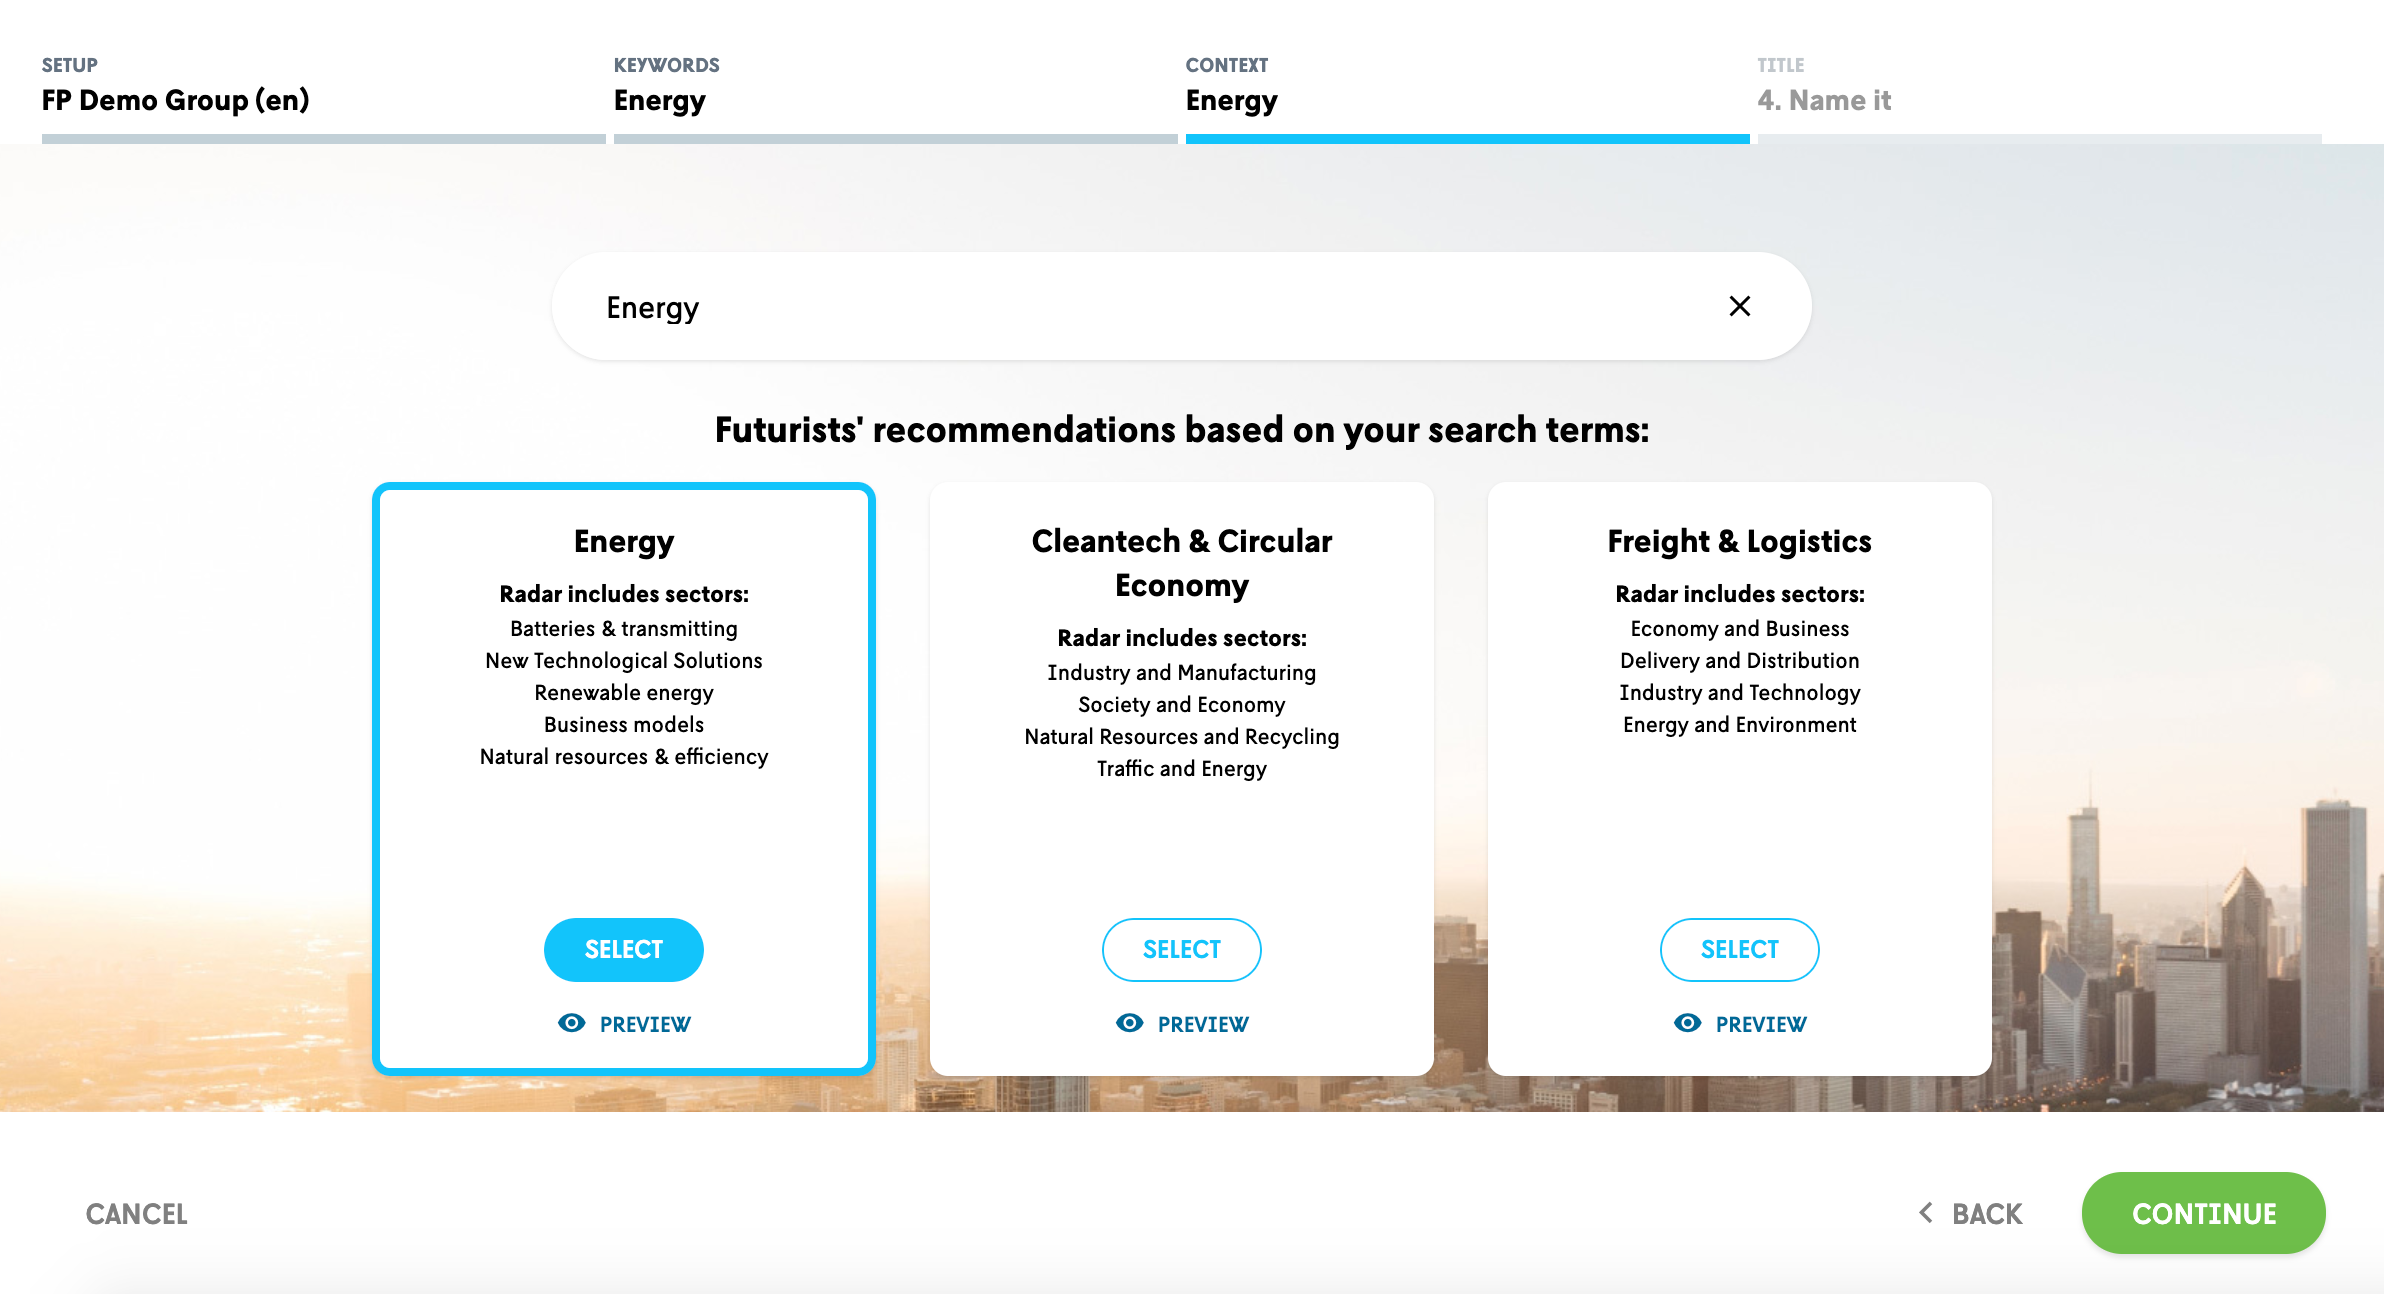
Next, you can give your radar a name. We recommend including the name of the radar you selected (e.g. Energy) in the name and adding some identification to the name as well, such as the name of the project, team or person who created the radar.

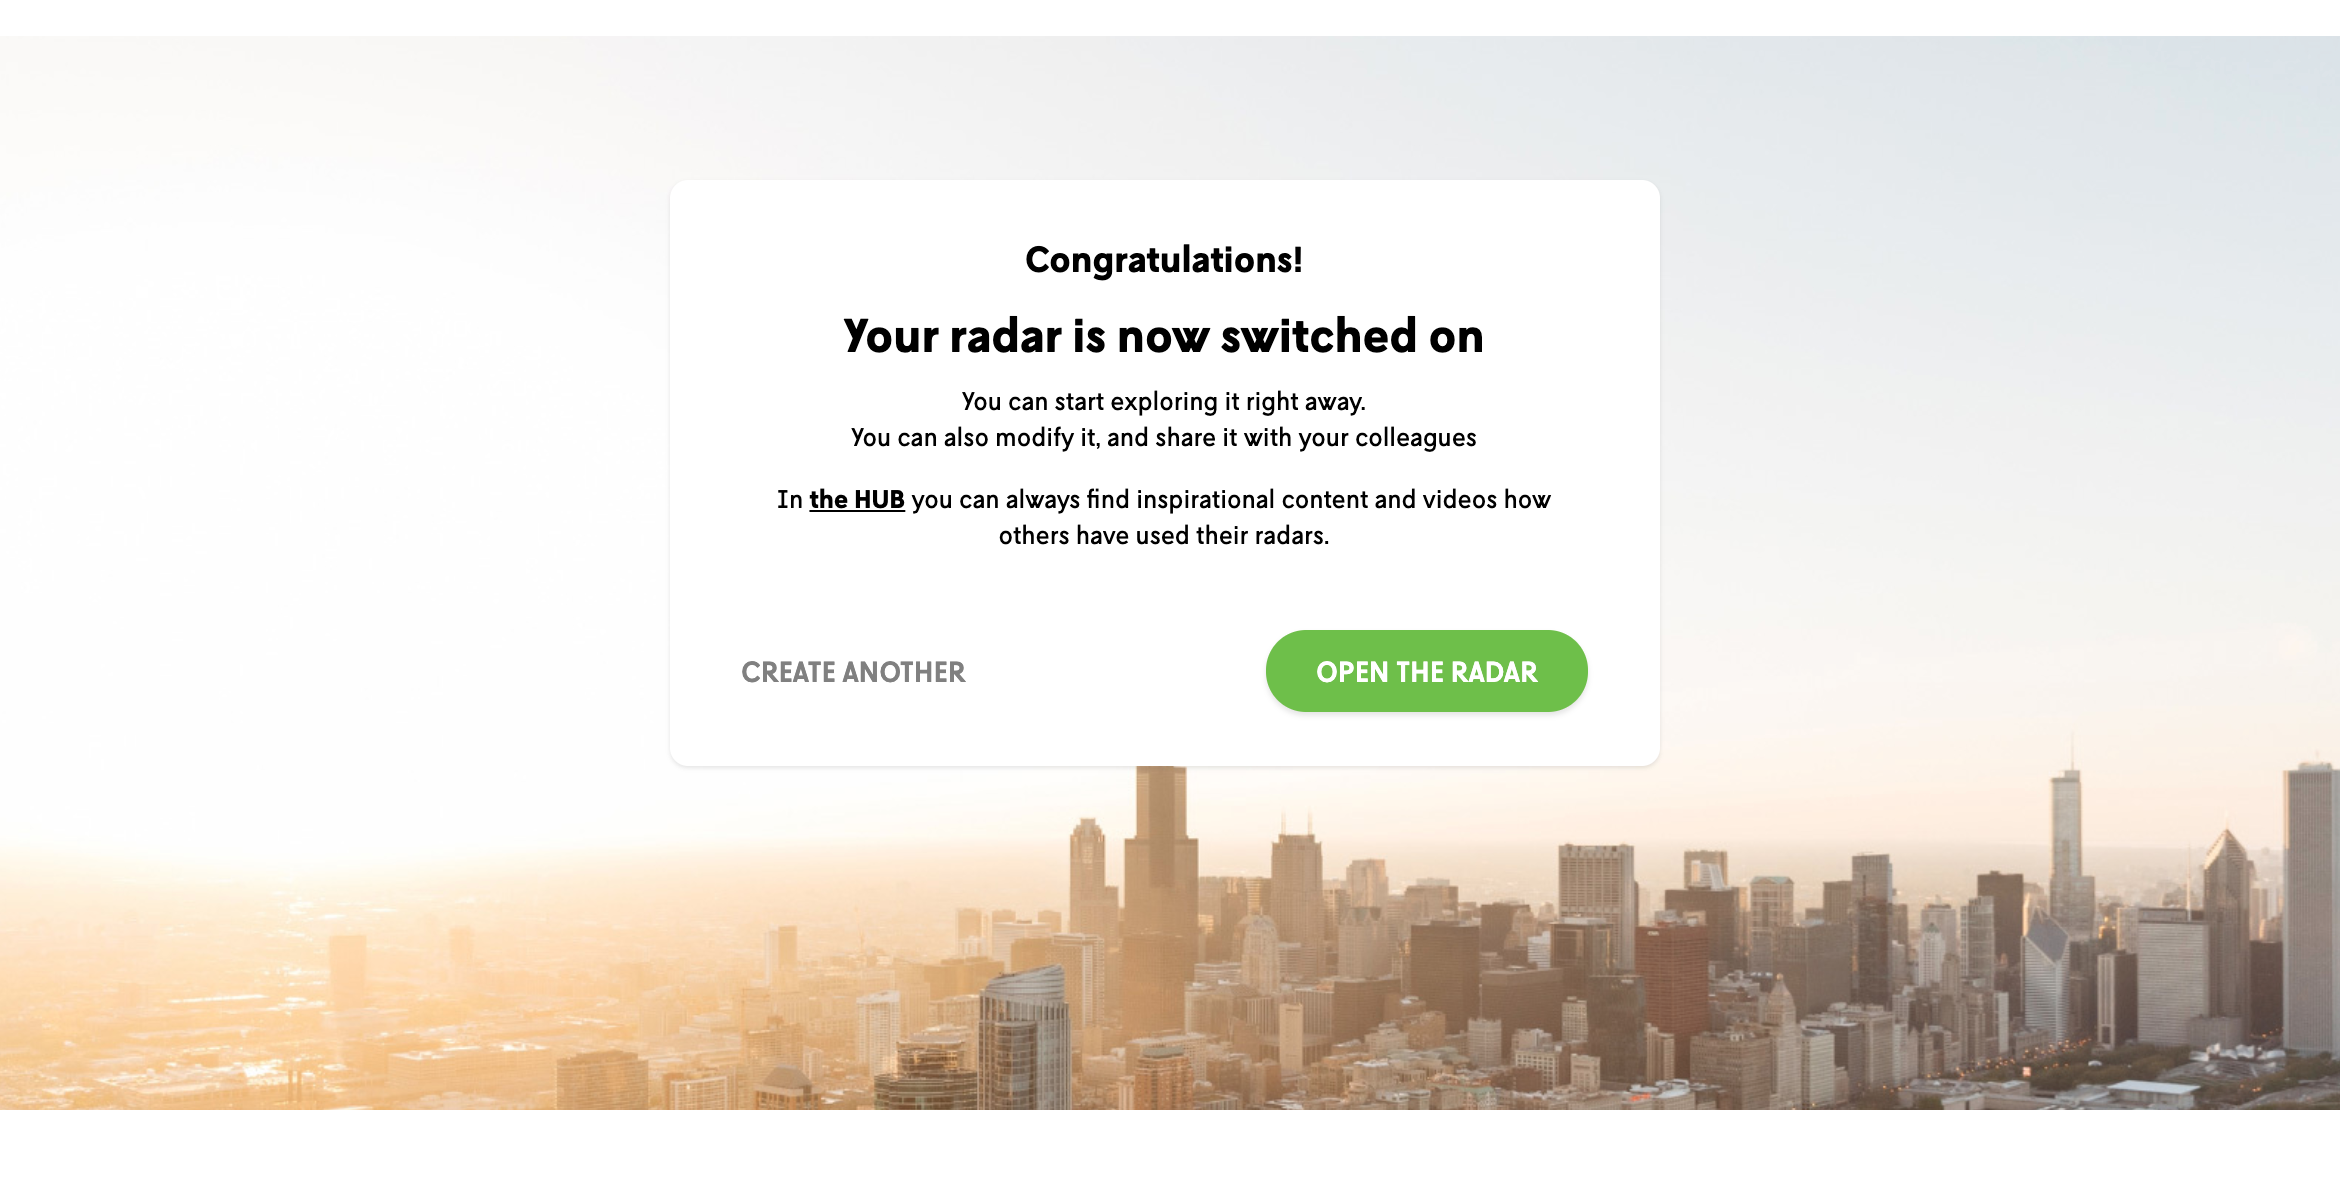
Now your radar is switched on! You can access the radar by clicking "Open the radar" or you can create another radar by selecting "Create another".

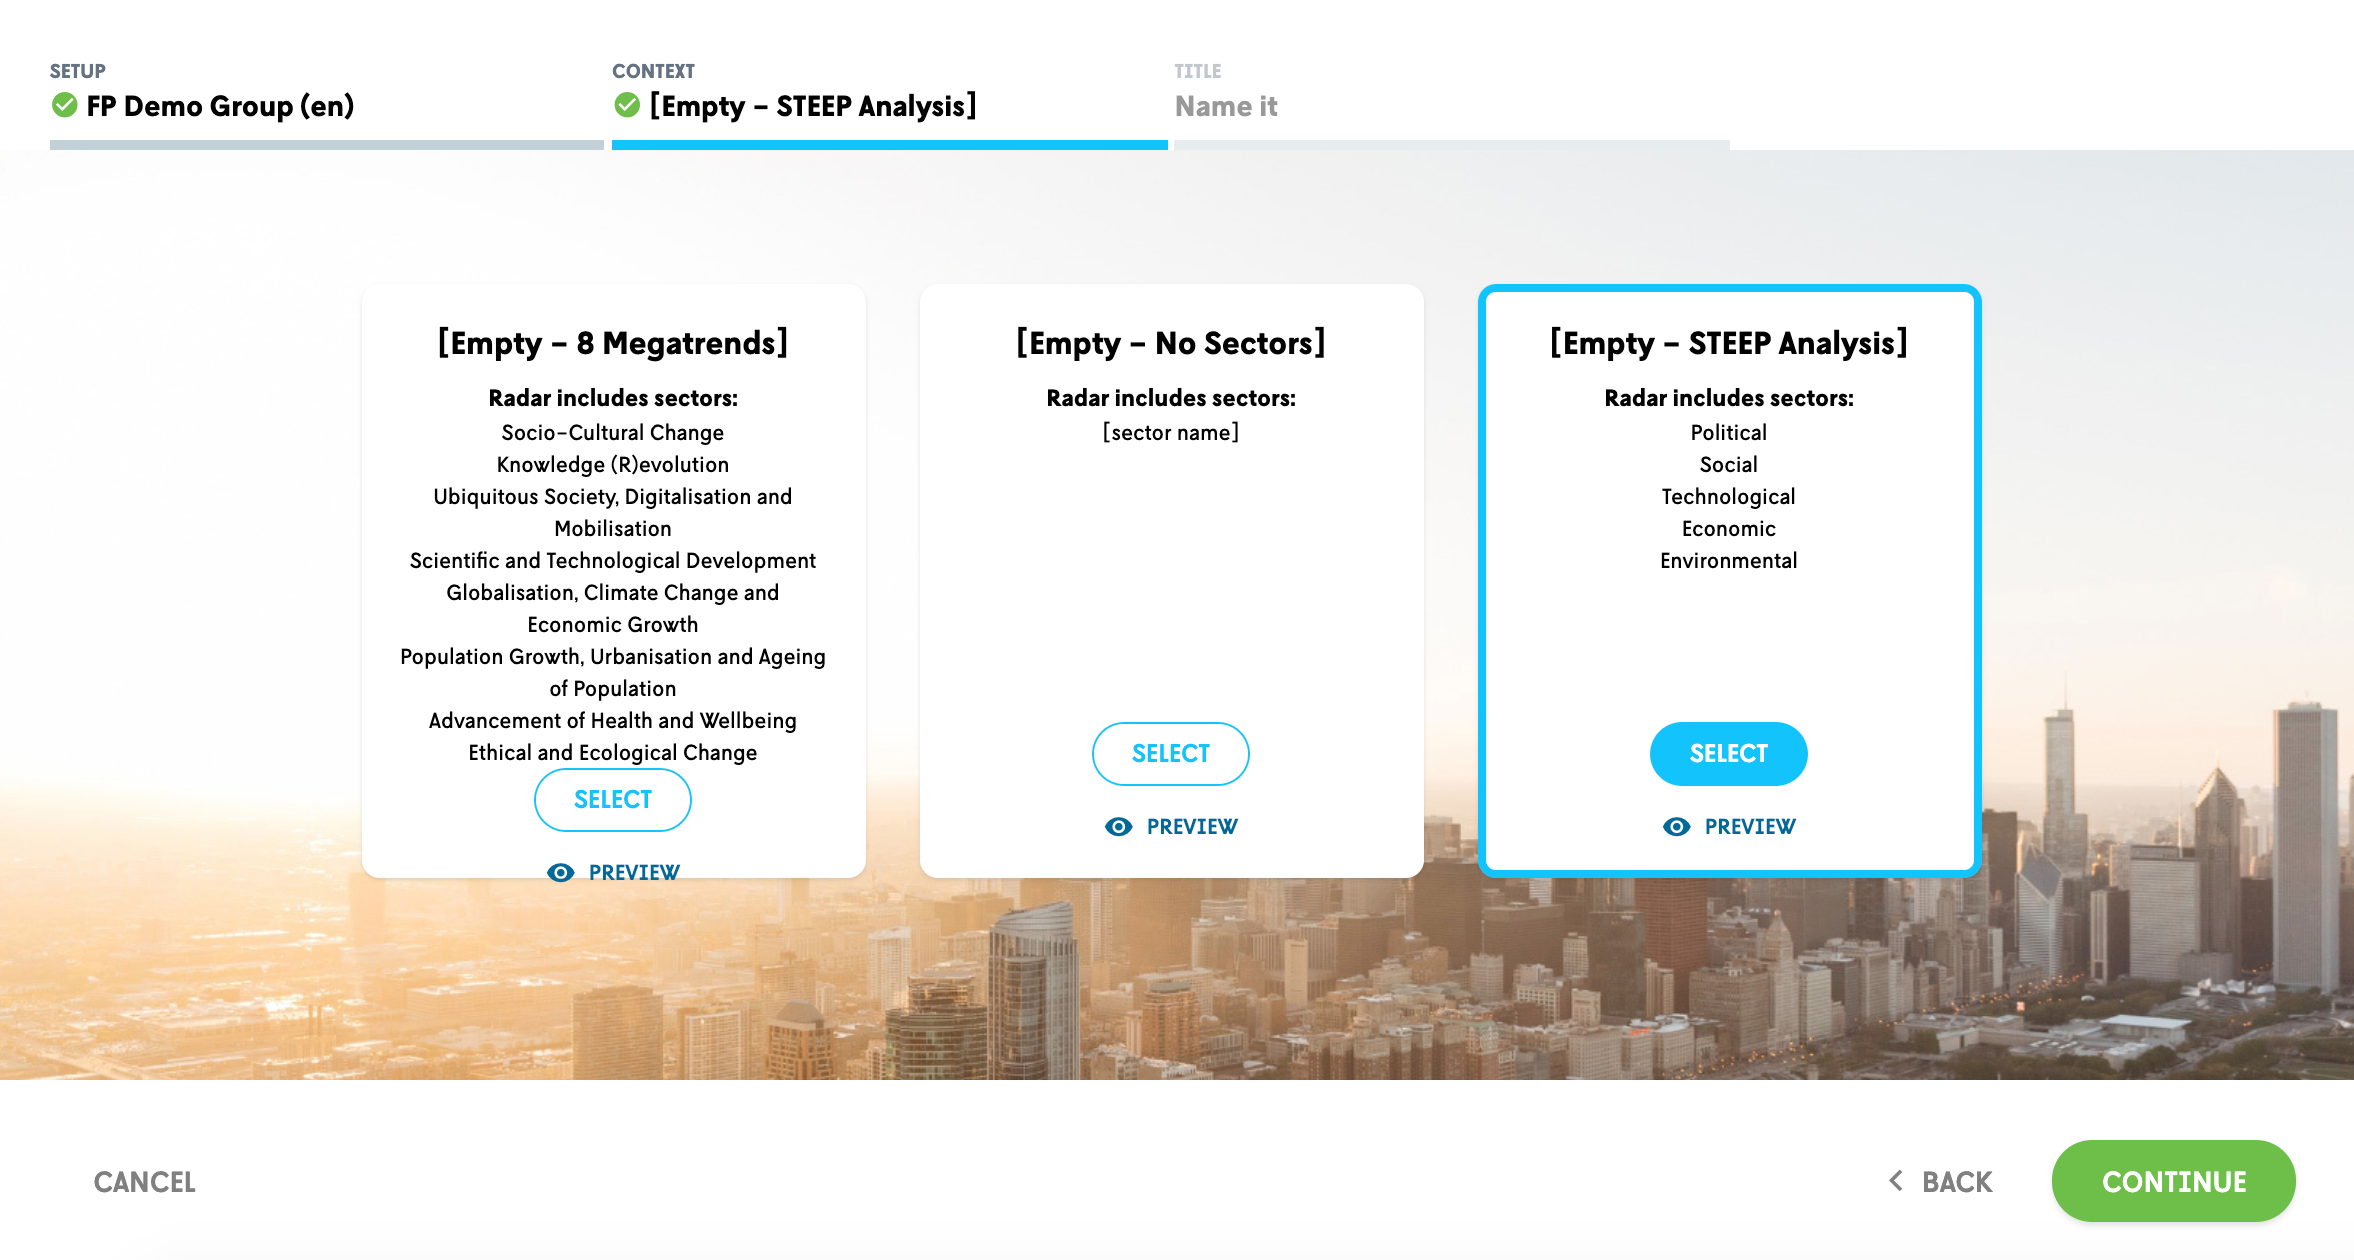
3.2. If you select "Empty" from the "Prefilled content" dropdown menu, this allows you to start building your radar from scratch with en empty radar template. If you wish to start with an empty radar you need to select and add the relevant phenomena for the radar from our content database, and from the content you have added to your workspace. There are three empty radar options which you can choose from. After choosing the template you are able to adjust the sectors as you wish. The three empty options have the following sectors:
Empty – 8 megatrends
This empty template provides 8 (eight) standard sectors for the radar:
- Globalisation, Climate change and Economic Growth,
- Urbanisation and Ageing of Population,
- Advancement of health and wellbeing,
- Ethical and ecological change,
- Social-cultural change,
- Knowledge (r)evolution,
- Ubiquitous society, digitalisation and mobilisation,
- Scientific and technological development
Empty – STEEP Analysis
This empty template provides sectors based on STEEP / PESTE:
- Social
- Technological
- Economic
- Environmental
- Political
Empty – No sectors
This template gives you the freedom of defining sectors yourself.
You can preview all options before selecting the template you wish to start with.
Next, you can give your radar a name. We recommend adding some identification to the name, such as the scope, name of the project, team or person who created the radar.

Now your radar is switched on! You can access the radar by clicking "Open the radar" or you can create another radar by selecting "Create another".
3.3. Radars Created by our team of futurists
Our futurists have created and update radars for different themes, which contain the most relevant global phenomena for the domain. The phenomena on the radars are placed on a timeline to demonstrate the point of impact of the phenomenon. These radars can be used as they are to spark conversation or to wind-tunnel your plans, or you can use them as validated starting points to start customizing them to your needs (see how to edit radars here).
You can find the following futurist-created radars from Futures Platform:
| Construction & Urbanisation |
| Global Economy |
| Work & Income |
| Culture & Creative Industries |
| Management & HR |
| Health & Wellbeing |
| Artificial Intelligence |
| Business |
| Data & Digitalisation |
| Energy |
| Extended Reality VR / AR |
| Industry & Manufacturing |
| Private & Public Transport |
| Public Governance |
| Sciences & Research |
| Education & Knowledge |
| 30 Themes |
| Digital & Sharing Economies |
| Future Disruptors |
| Retail & Buying Behavior |
| Future Cities |
| Tourism & Hospitality |
| Global Megatrends |
| Leisure & Lifestyles |
| Values & Ethics |
| Cleantech & Circular Economy |
| Communication & Media |
| Population |
| Sustainability & Recycling |
| Raw Materials |
| Climate Change |
| Food |
| Freight & Logistics |
| Nature |
| Finance & Ownership |
| Security & Safety |
| Services |
| Politics & Policies |
| COVID-19 - Initial Shock and Adaptation |
| Exit from Covid-19 - What impacts will stay? |
| Trends Affected by the US Elections |
|
Metaverse: How Should Organisations Prepare? |
|
Region Radar: North & South Americas |
|
Region Radar: Asia-Pacific, China, Australia (APAC) |
|
Region Radar: Europe, Middle East, Africa (EMEA) |
|
Phenomena with Scenarios - A Selection |
|
Global Impacts of the War in Ukraine |
|
Future of Government |
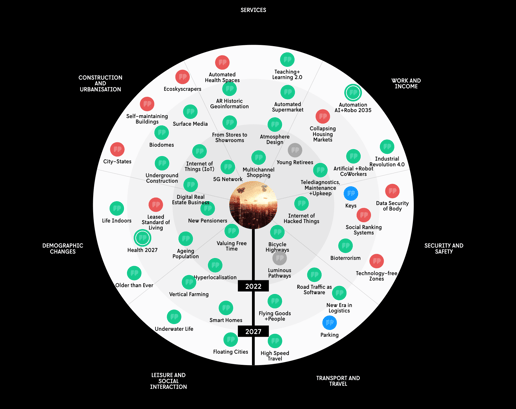
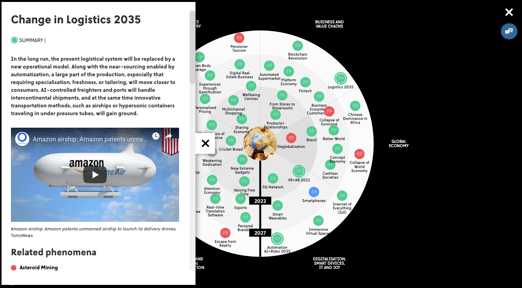
4. VIEW PHENOMENA ON THE RADAR
On the radar view, you can open the phenomenon description written by our team of futurists, view the latest news and articles related to the phenomenon, and study the related phenomena by clicking the phenomenon dot which opens the content card.
5. EDIT THE RADAR
See here a video how to edit the radars.
Owner, Coordinator and Editor-level users can edit the radars.
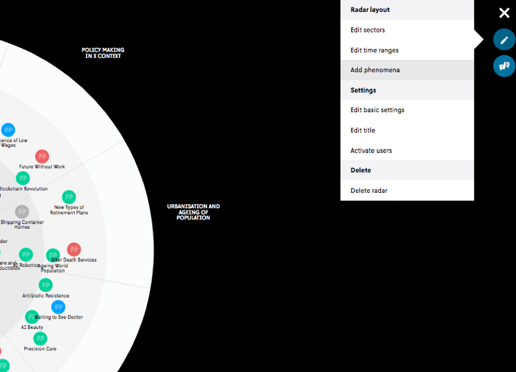
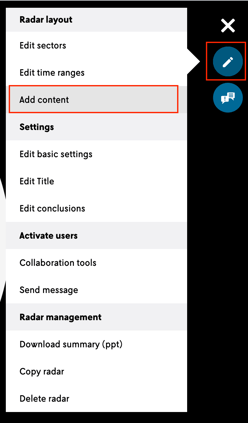
Most of the editing functions are located under the "pen icon" on the right-hand corner of the radar.
User-level users or radar visitors cannot access the radar editing option.
From the edit menu, editors can also edit other settings of the radar such as:
- Adding new phenomena
- Activating the collaboration functionalities
- Editing sectors and time horizons on the radar
- Invite users to the radar
- Copy a radar
- Delete a radar
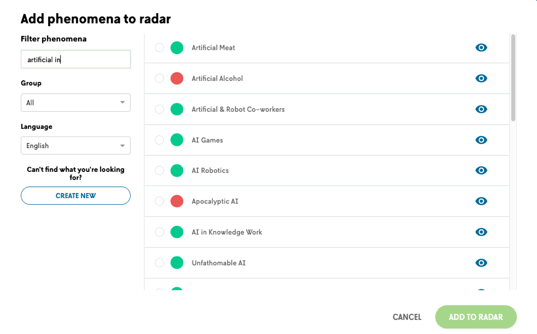
6. ADD PHENOMENA TO THE RADAR
See here a video how to add phenomena to a radar.
Under the pen icon, click the edit button, then click ”Add phenomena”. You can make a keyword search to Futures Platform´s 800+ phenomena database to find relevant content. Click the name of the phenomenon to open the content card to learn more about it.
Select the one that you want to add to your radar, click “Add to Radar”, and the phenomenon will appear on your radar.
Now you can drag and drop it to the relevant sector and time horizon on your radar.
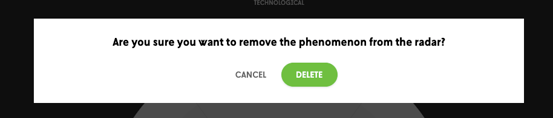
7. REMOVE PHENOMENA FROM THE RADAR
To remove phenomena from the radar, simply drag and drop the phenomenon dot outside of the radar until a pop-up message appears.
Confirm you wish to remove the phenomenon from the radar. You can always re-add the phenomenon to the radar later on.
8. CREATE AND EDIT YOUR OWN CONTENT
You and your team can add your own content (signals, trends, phenomena, notes etc.) into Futures Platform. This custom content will only be visible within your group, not to other Futures Platform's users.
8.1. Creating new content
To create your own content, navigate to the Content Explorer page through "Content" button on the top navigation.
Scroll down and click the “Create New” button on the lower left corner of the page.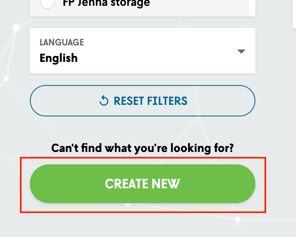
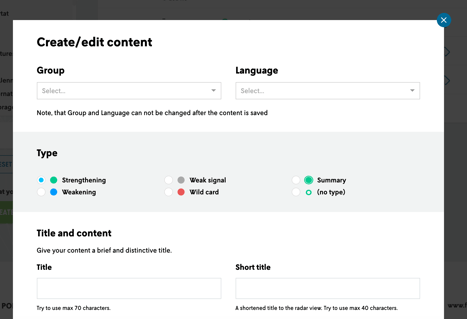
If you belong to multiple FP workspaces you can select to which group you wish to add the content to. You can also select the language (English/Finnish available now, if you add content with another language you can select English). Next, you can select the content type. When choosing the type, you can select from our five existing types, or select "no-type". "No-type" can be used for example for a draft (e.g. a trend in a pre-evaluation phase) or to add action points / notes of meetings or development. Then, you can name your content.
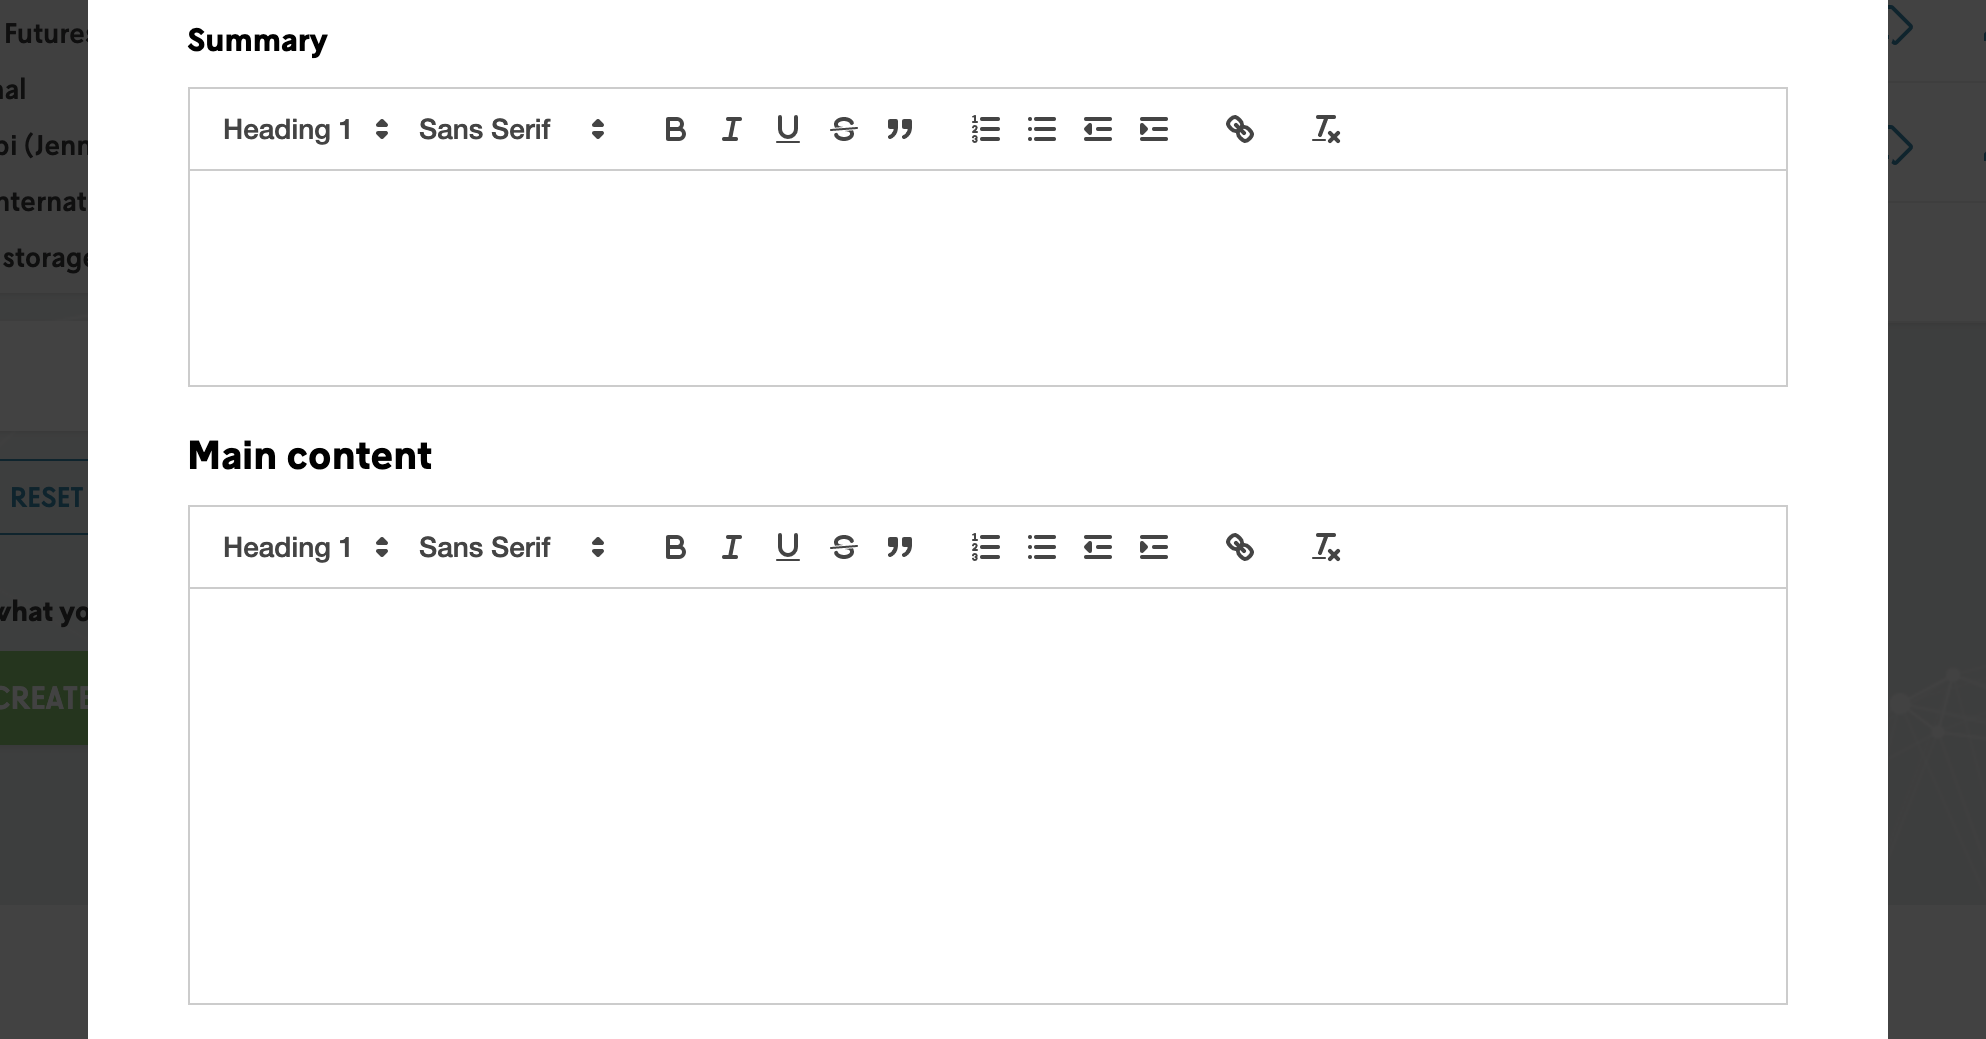
You can add a summary of the content to "Summary" and main body text to the "Main content" section.
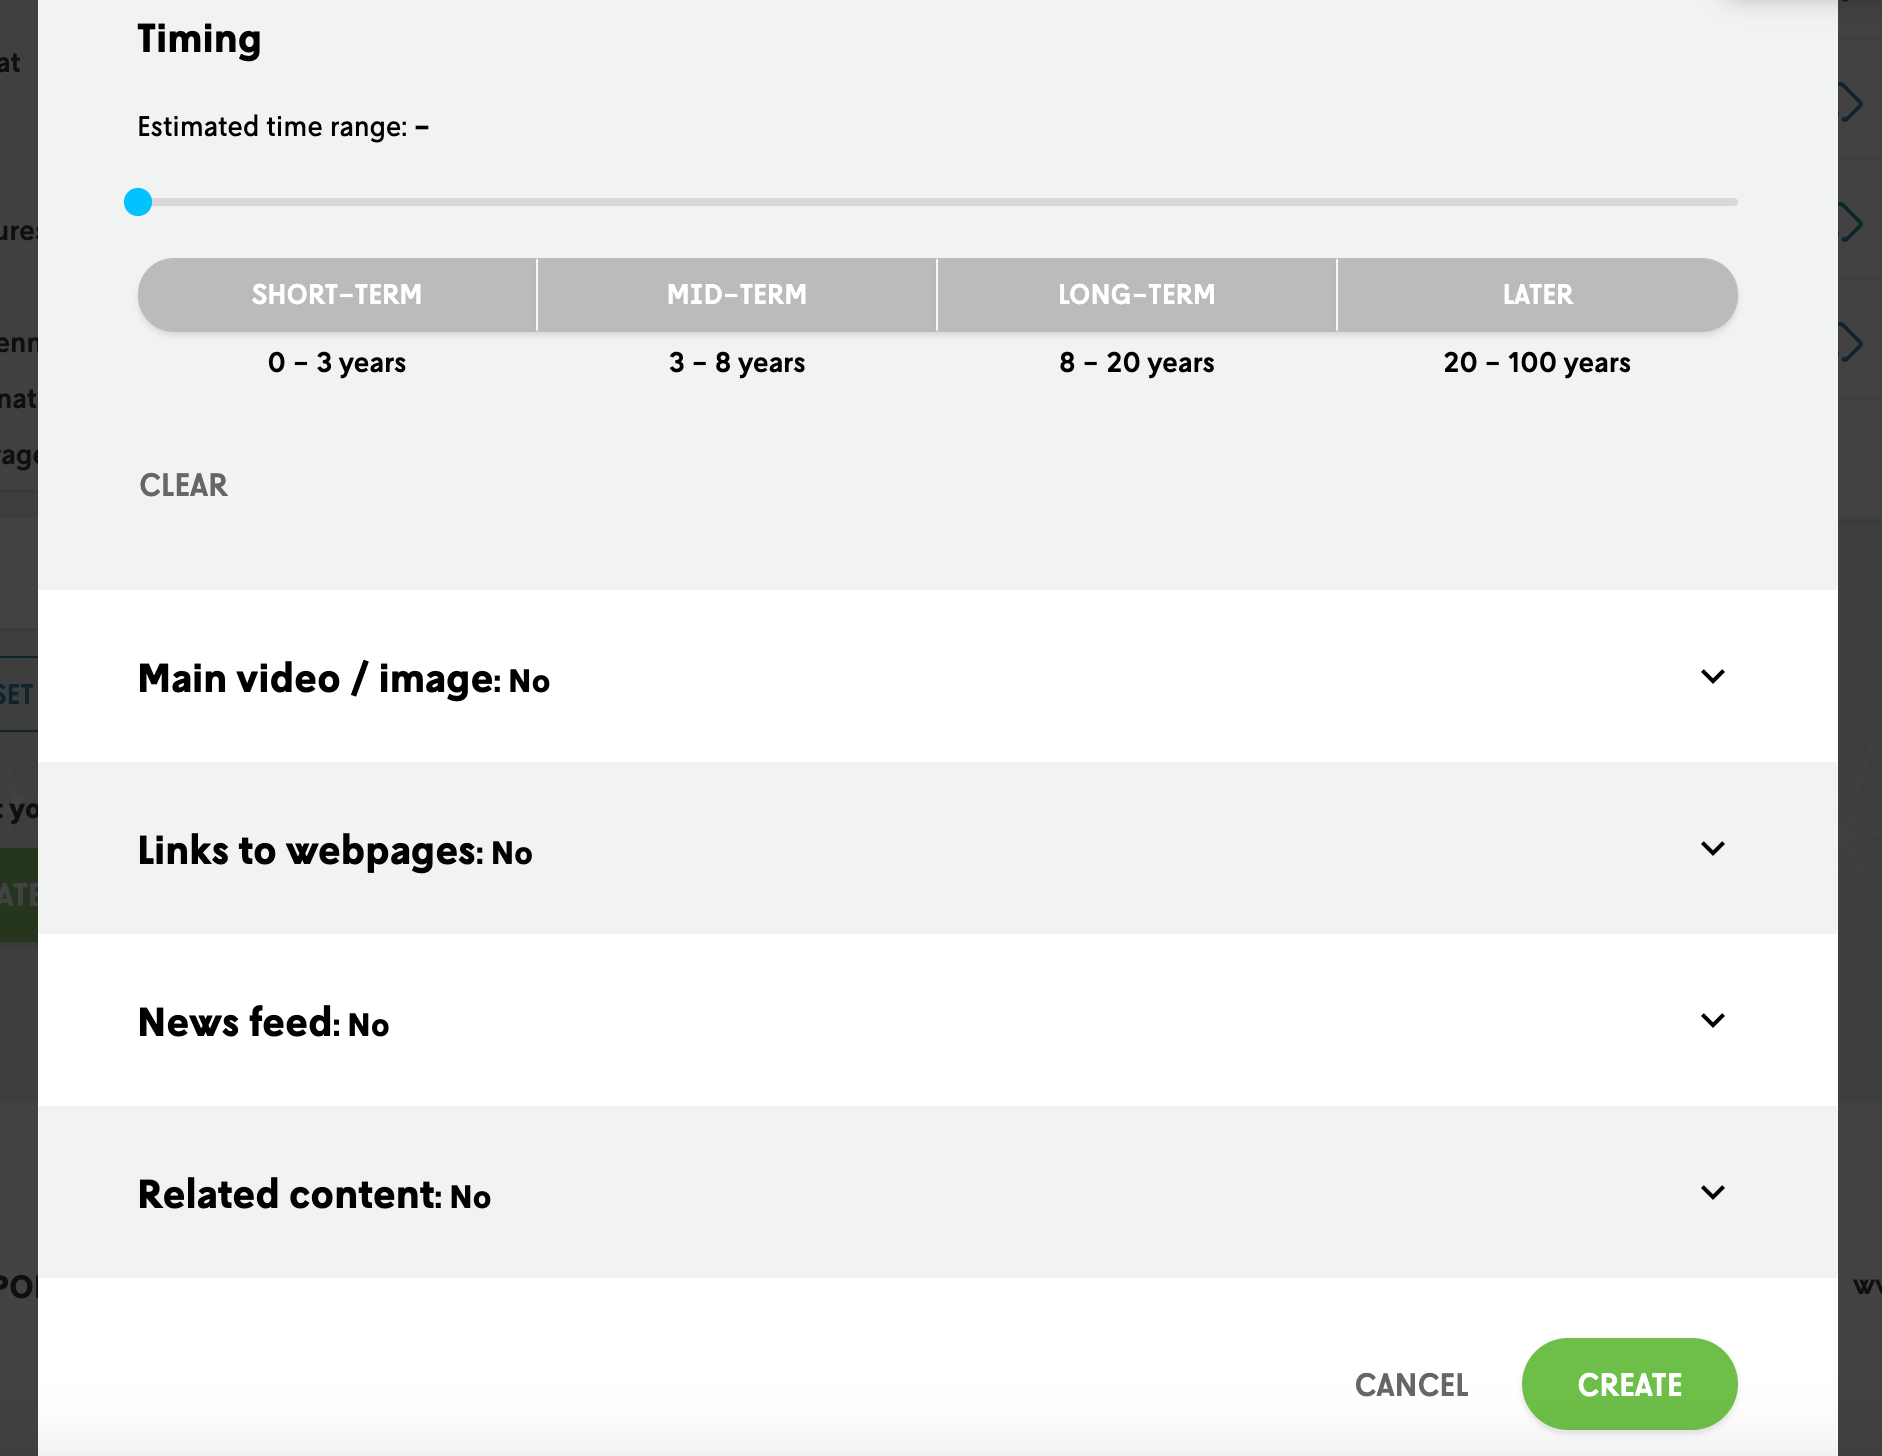
If you want, you can select the estimated time range for the content. You can also attach images, videos, links, news feeds and other content from the database to the content (when adding links and RSS-feeds remember to use the safe link starting https://).
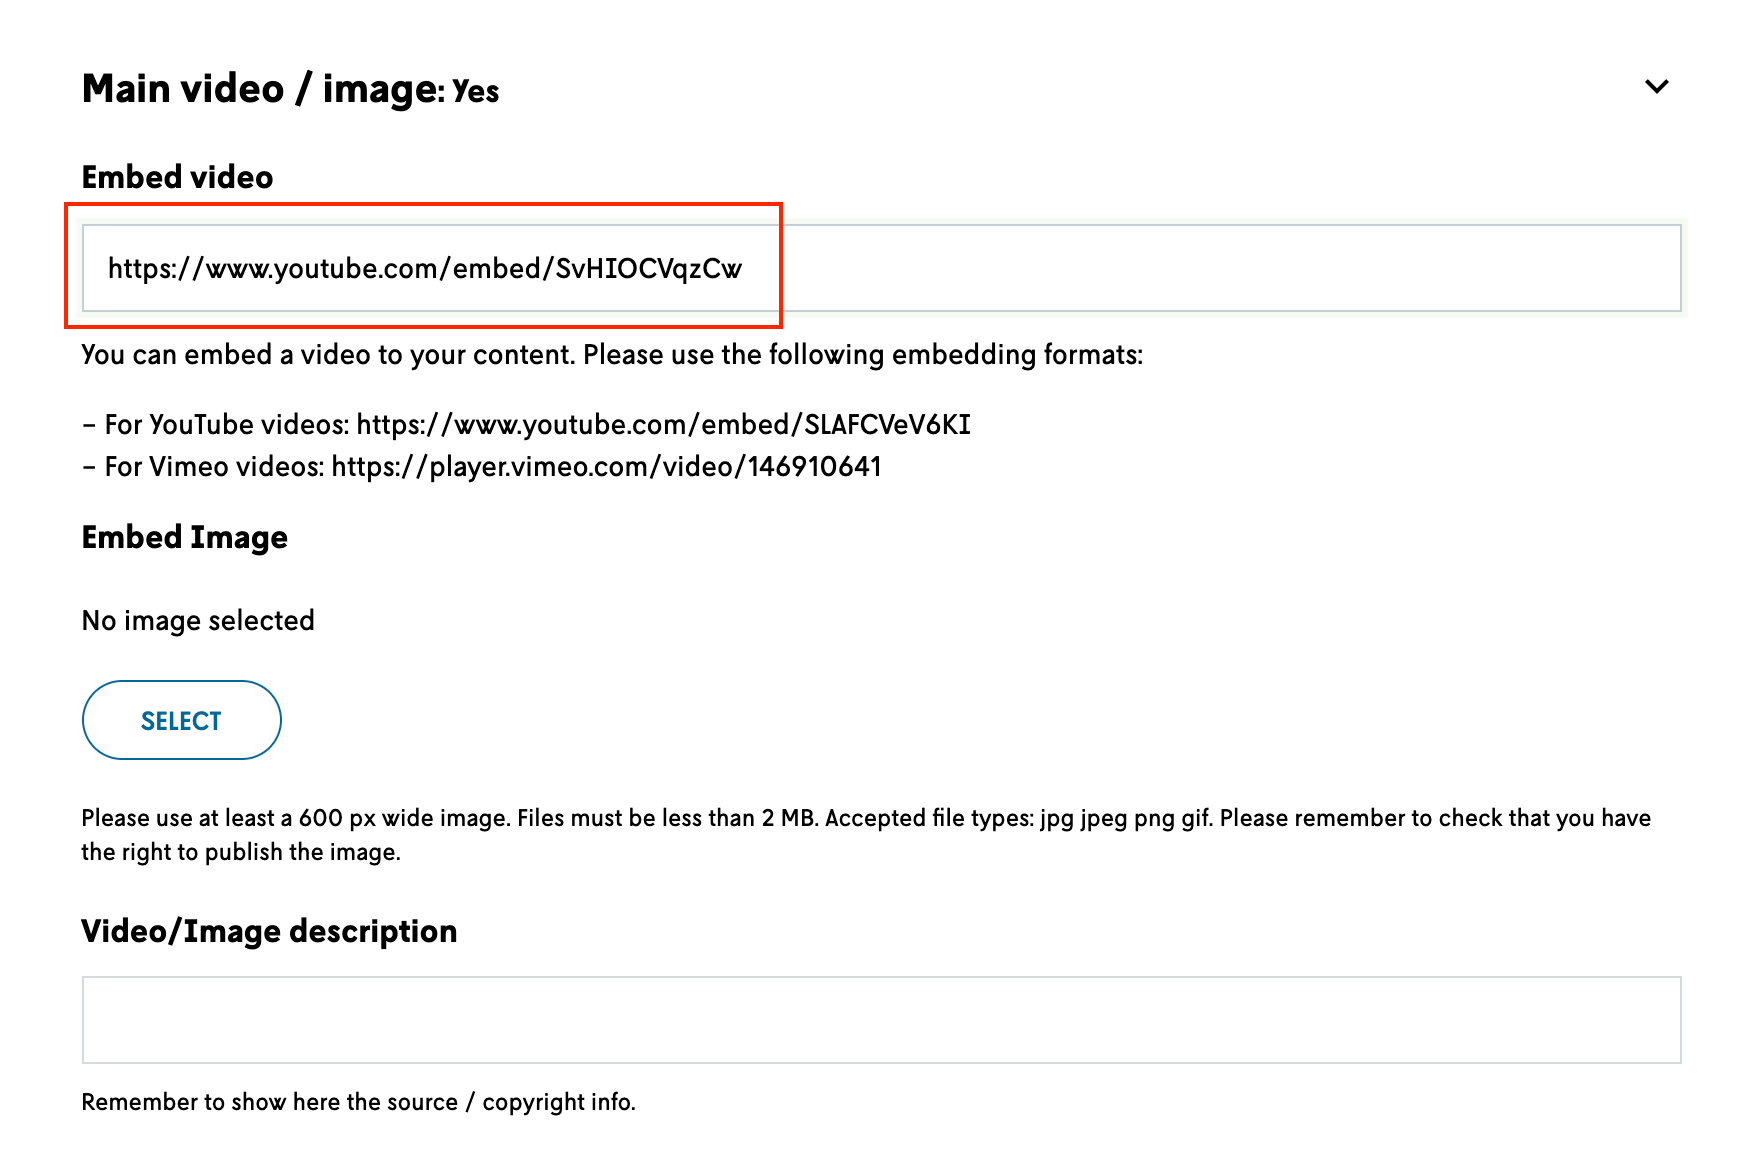
How to embed a YouTube video to a content card?
1. Go to YouTube and open a video you wish to embed.
2. Right click on top of the video with your mouse and select "Copy video URL". Paste the link to a text file and copy the video ID from the link (https://youtu.be/SvHIOCVqzCw)
3. Open the "Main video/image" section on the content card by clicking the small arrow next to it. Type the following to the field: https://www.youtube.com/embed/ and then paste the video ID after it, like this: https://www.youtube.com/embed/SvHIOCVqzCw
4. You can add a description of the video (please add original source/copyright if it is not your own content)
8.2 Customising Futures Platform's content
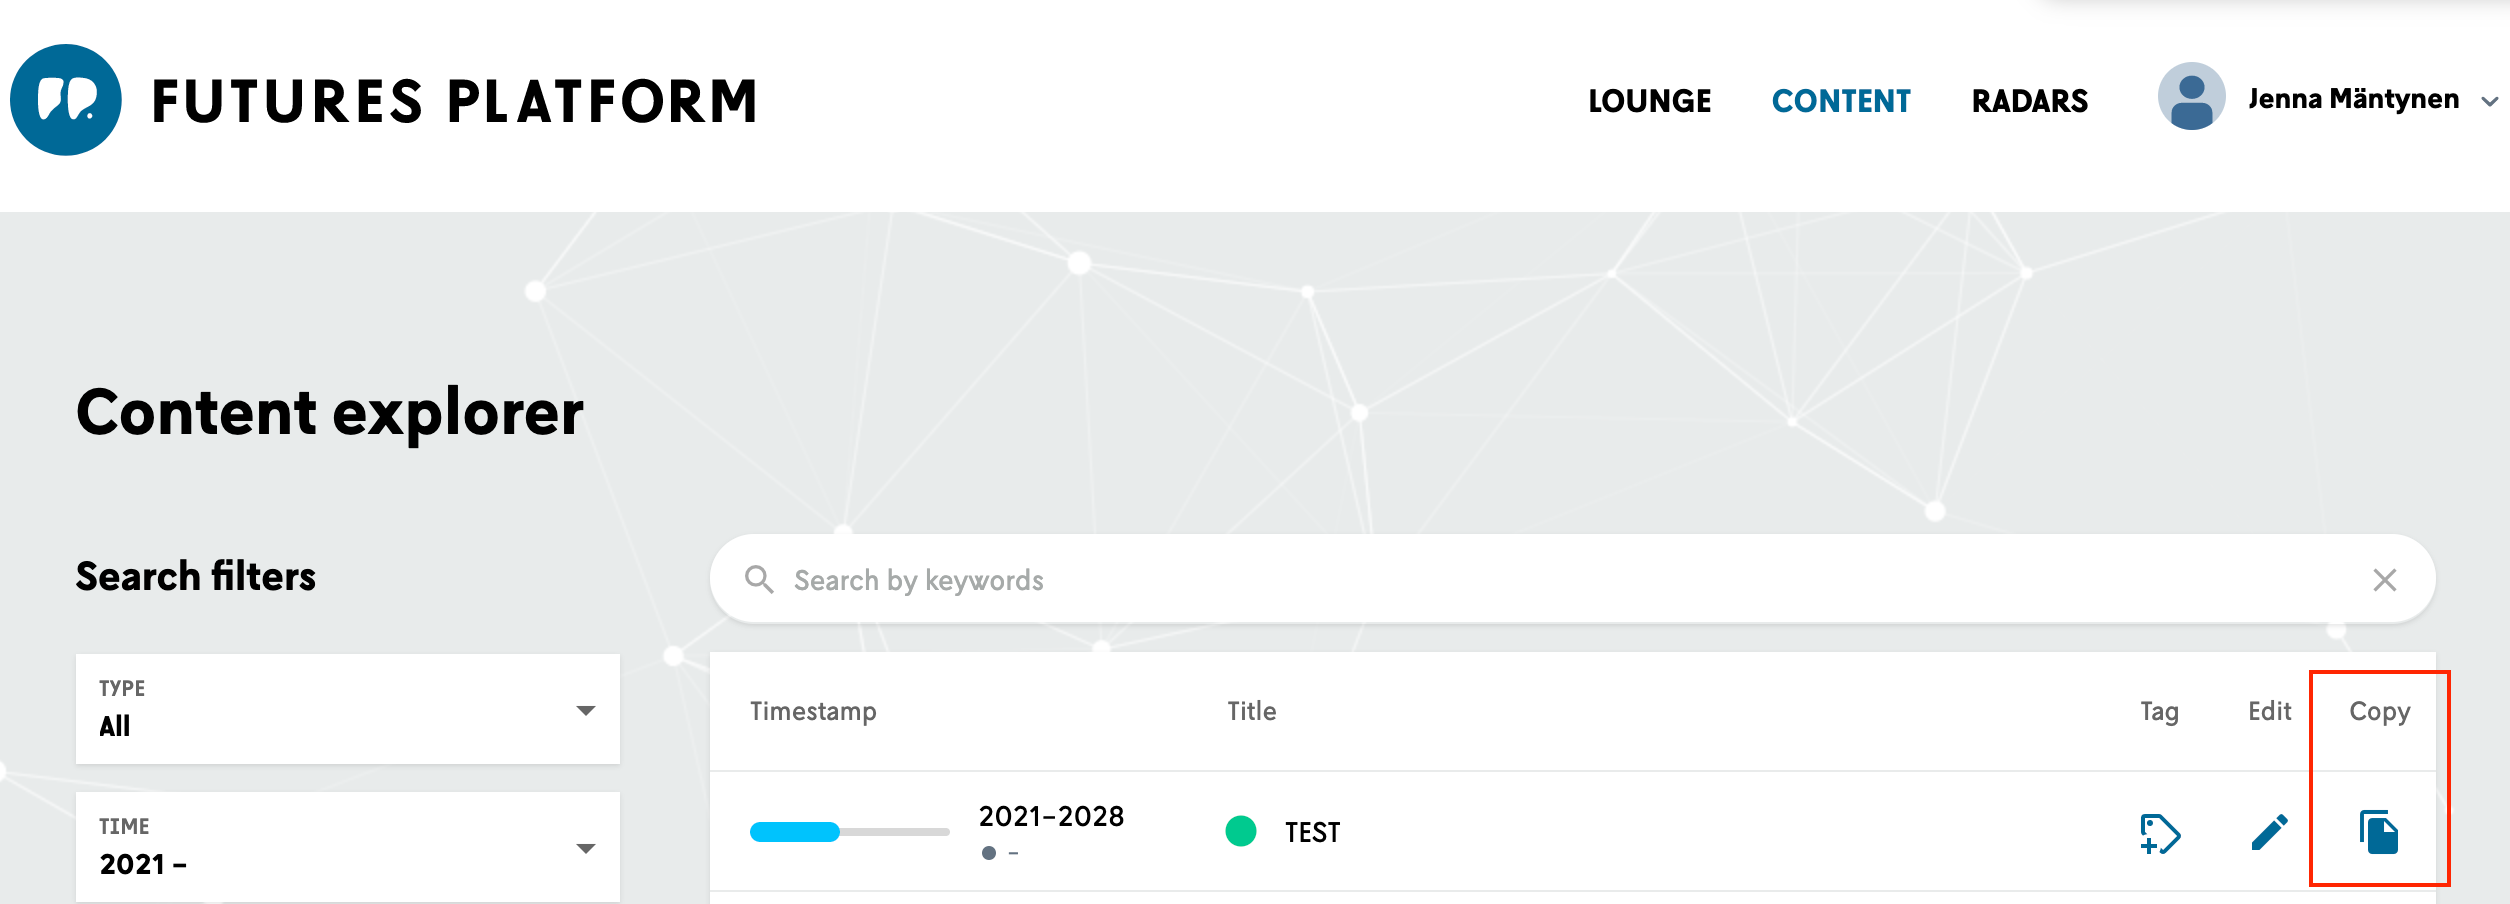
You can also take a copy of any content created by Futures Platform's futurists and start customising it to your needs (industry specified, localised etc.). Click the “Copy” button next to a content you wish to edit. Note! This won't edit the master copy, it will only duplicate the content card. If you localise the content by adding e.g. local impacts, you can name the copied content like "Right to Disconnect / Asia". You can find all content you have created by changing the "Group" from the Search filters on the left side of the Content Explorer page.
8.3 Editing content
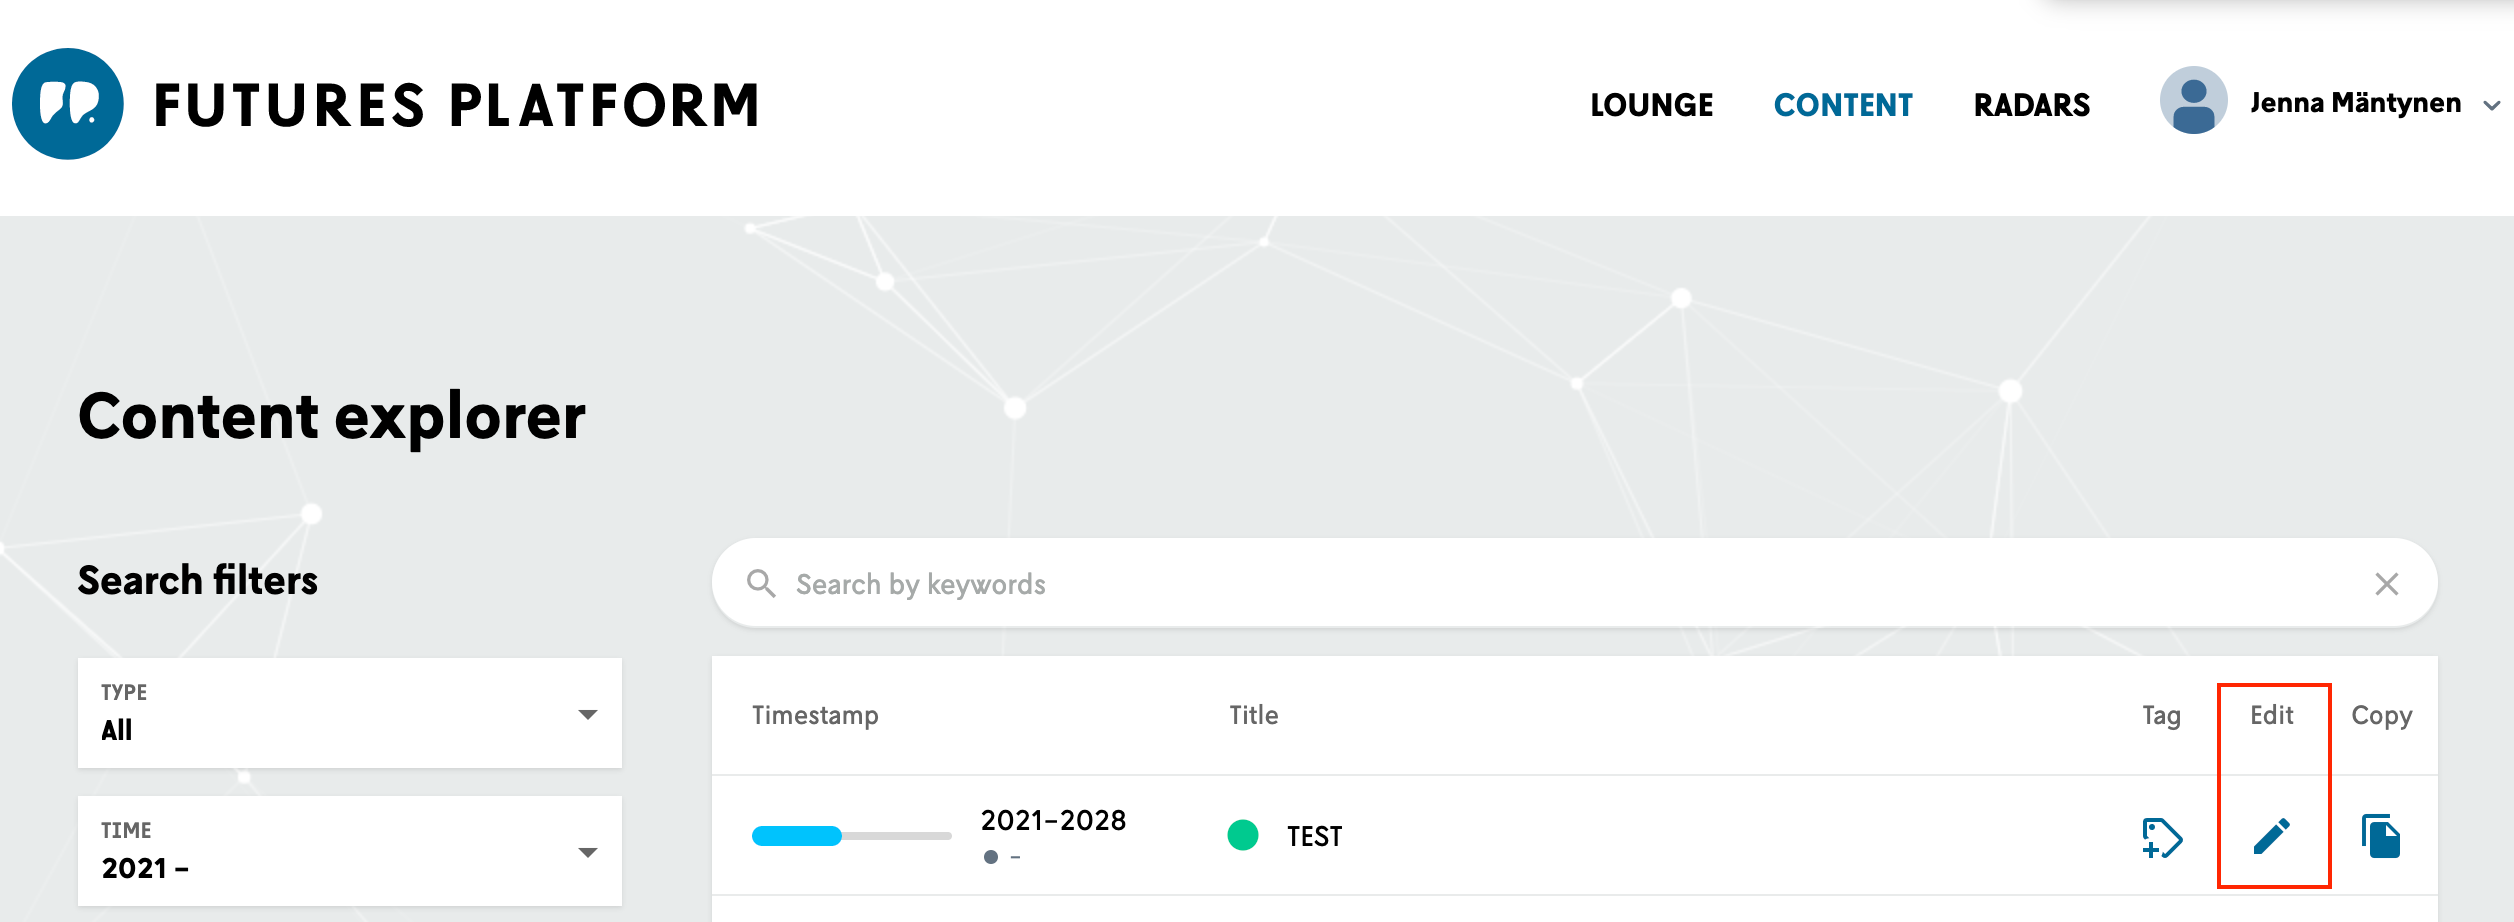
You can only edit the content you your your team members have created yourself. Content created by Futures Platform's futurists can not be edited (unless you take a copy of it). The original content created by Futures Platform's futurists is being updated continuously by the team. You can edit any of your own content by clicking the edit button next to it.
8.4 Creating content on a radar
You can also create content directly on a radar. Please note, that only users with "Owner", "Coordinator" or "Editor" access level rights can add content on a radar.
Adding content on a radar will store the content in the same database as the content that has been created on the Content Explorer page. The benefit of adding a content to the database on a radar is that when you are working with a specific radar and you notice something missing, you don't need to navigate to Content Explorer page to add the content.
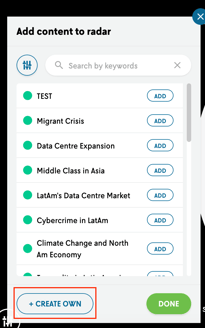
On the radar, click the pen icon and select “Add content".
The content window opens up and now you can select the "+ Create own" button to add your own content. Once you have filled in the content card, you must place the new content on the radar by clicking once on the relevant horizon/sector.
Tip! With our Signal-tool (to be purchased separately, ask more from FP team), you can add a functionality to your internal intranet, where all your employees can take part in inputting new trends or phenomena they have discovered and think is relevant for your organisation.
9. COLLABORATION TOOLS
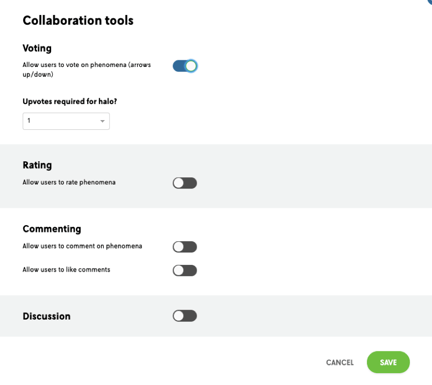
Once your radar is ready for the collaboration process, you can enable the for voting, rating, or commenting features.
Activate these features on the radar by clicking the Pen icon and selecting “Collaboration tools”.
Enable them by clicking the toggles once until it turns blue.
Once users have been contributing, you can view the results of the collaboration by clicking the conversation button on the radar (the Speech icon below the Pen icon).
-
Voting
Watch this video to see how the voting tool can be used.
"Upvotes required for halo?" means that how many votes you select to be the level where the phenomenon is highlighted on the radar (the halo around the dot).
This way you can visualise the top voted phenomena on the radar view.
-
Rating
Watch this video to see how the rating tool can be used.
If you enable the rating tool, you will be able to select the names of the axis.
As an example, you could, for name the horizontal axis as "Time horizon" and the vertical axis as "Impact".
For the left end of the "Time horizon" axis, you can label it "Near term/2019" and "Long term/2030" for the right end.
On the "Impact" axis, you can label the low end as "Threat" and "Opportunity" for the high end.
In the picture below, you can see that you can also name the four sections of the 2x2 table.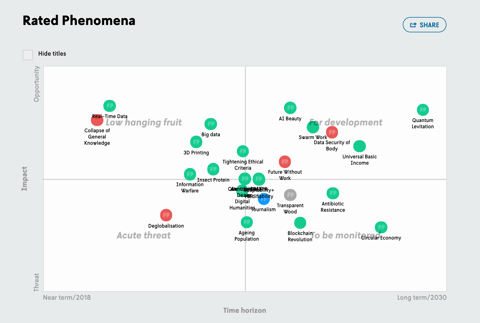
-
Commenting
If enabled, the comments section will appear on the trend cards on the radar.
Three comment fields will automatically appear where users can leave comments under "Opportunities", "Threats" and "Actions".
You can also view the comments on the Result page by clicking the conversation button on the radar view.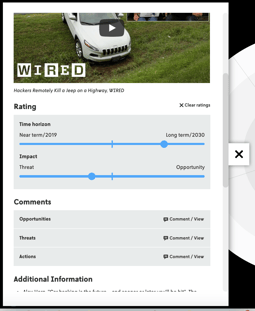
-
Discussion
In case you want to have a place for conversations or to collect ideas, you can enable the "Discussion" feature.
A conversation board will be available and can be accessed through the conversation icon on the radar view.
The "Discussion" section is a great place for general comments, and it is useful to collect answers from teams/participants in workshops.
It can also be used to collect feedback.
10. INVITE AND ACTIVATE USERS
Users with "Owner" or "Coordinator" access can invite other people to the radars (respecting the user limitation of your package). Owner will be the first person in the group (automatically set). If the "Owner" persona needs to be changed please contact our team.
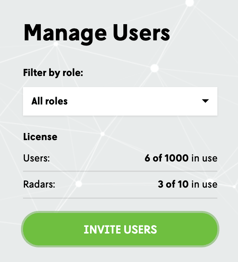
To add users click the pen icon next to your Group on the Lounge. If you do not see this section you do not have "Owner" or "Coordinator" access to your workspace. In this case please contact the main user of your workspace or Futures Platform support at support@futuresplatform.com.

On the user management page click the green"Invite users" button.
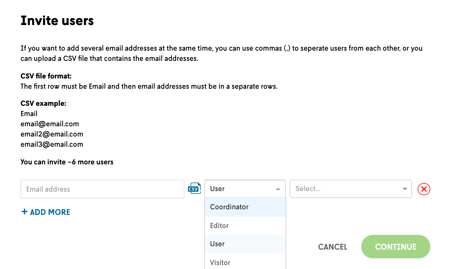
When adding new users you can define the access level rights of each user.
-
Coordinator, can view all content on the platform, can create new radars, can view and edit all radars created by everyone, add and edit own content, access user management (edit & add users), can collaborate on radars if it is enabled
-
Editor, can view all content on the platform, can create new radars, can create and edit own content and the radars they have created/been given access to, but cannot access user management, can collaborate on radars if it is enabled
-
Member, can view all content on the platform and the radars they have been given access to, can collaborate on radars if it is enabled (no editing access)
-
Visitor, can have a temporary access only to a specified radar but does not have access to the full platform (no platform log in needed), can collaborate on radars if it is enabled (no editing access)
If you already have created radars you can also select to which radars the users have access to. Please select all the radars you wish the user / users to have access to. You can add many users at once by clicking "+ add more".
Remember to give the invited users “Coordinator” rights, if you want them to be able to create their own radar and invite people to your workspace.
If you only want them to be able to edit your radars without having the user management options, give them “editor“ rights.
“Member” can only browse, vote, rate, and comment on a particular radar.
With "Visitor" access you are able to give user access only to a radar of your choice and not any other parts of your workspace (other radars, phenomena page etc). The platform will send them a link via email which allows the user to access the radar directly to view phenomena on it and collaborate, in case you have activated collaboration tools on the radar. You can set an expiration date for the link. Once the visitor link has expired, based on the set time, the user can no longer access the radar.
If you want to add several email addresses at the same time, you can use commas (,) to seperate users from each other, or you can upload a CSV file that contains the email addresses.
CSV file format: The first row must be Email and then email addresses must be in a separate rows.
CSV example:
Email
email@email.com
email2@email.com
email3@email.com
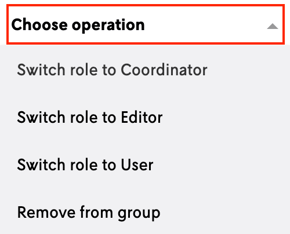
If you wish to edit the access level of an existing user, select the user you wish to modify by clicking the tick box icon next to the email and open the "Choose operation" menu.
11. EXPORT THE RADAR AND COLLABORATION RESULTS
You can export the radar to PowerPoint format with the export functionality. Click the pen icon on the radar and select "Download summary (ppt)". This way you are able to export the radar, sector descriptions, summary of each phenomenon and the collaboration results into a PowerPoint document. This way you can easily include the phenomena, radar and your collaboration results into your presentations and reports.
12. FUTURES PLATFORM SUPPORT
For further help, you can contact us at support@futuresplatform.com.
ENJOY DISCOVERING AND CREATING THE FUTURE!
